.jpg)
.jpg)
.jpg)
.jpg)
.jpg)
SUPPLIES
Clipboard- Creative Imaginations
Patterned papers- My Minds Eye (29th Market Street Fresh Brothers) - Playground stripe/ Sidewalk Chalk Paper and Vine Scroll/ Grass green paper
(Wild Asparagus “Brothers”) Polka dot/ Light blue paper and Stripe/ Orange paper.
Tags and transparencies - My Minds Eye
Big Bite
Acrylic paint, bubble wrap, ribbons, gems, mesh fabric, corrugated card, flat back pearls, craft wire, book rings and eyelets.
HOW TO
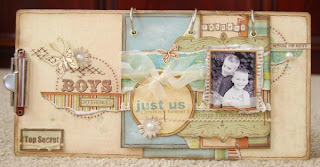
Cover the front of the clipboard then trim and ink the edges the edges
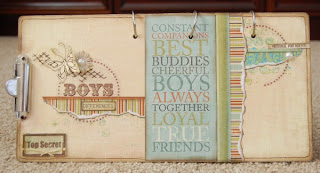
Cut four rectangles from the paper (reverse side) and arrange on the clipboard so they overlap each other. Mark the position of the book rings and cut appropriate holes in the clipboard and pages with the Big Bite. Set eyelets into the holes.
Make up ‘mini layouts’ on each page. I used cut and torn strips of patterned paper, corrugated card, ink, ribbons, gems, pearls, transparencies and tags. Use the same techniques on the clipboard.
*Tip* you can cut the tags to make smaller tags or even use the lettering to make new titles.
Assemble the pages and clip together on the clipboard with the book rings. I also used lined paper on the reverse of each page and added journaling. You can now add a stand to the back ( take one off an old photo frame), use an easel etc or add two more holes to the top and use thread to hang it on the wall.


2 comments:
That looks soooooooooo good. What a fun idea to use a clioboard on its side.
Eveline.
oh my goodness!! GORGEOUS!!!!
Post a Comment