Showing posts with label Fanny Delobel. Show all posts

Monday, August 31, 2009

Fanny- Grow


Grow
by Fanny Delobel

SUPPLIES
Papers:
Basic Grey Marrakech collection: - Green Tea
- Honey bush
- Vanilla Chai
- Massala bella
miscellaneous: paper lace

Embellishments:
Flowers: Prima hydrangeas
Prima Essential 4 "tea and silk"

brads: Basic grey brads
Strass (brads)

Miscellaneous:
Stickles: gold
Bingo Cards: Jenni bowlin studio
Hessian

HOW TO
Cut thin strips into patterned paper. Adhere them around the edges of the background to create a frame. Cut 2 strips of other patterned papers and place them on the center of the Lo (create a cross). Distress the edges of your photos and mat your them with hessian. Adhere your photos on the patterned papers.
Cut flowers into the "massala bella" paper and adhere them around the photos. Add prima flowers too, brads and buttons...
Use the bingo card to make your title and write your journaling on thin strips of paper. (adhere them with 3D foam) . At least draw doodlings with white pen and stickles

Friday, August 28, 2009

Fanny- Altered Canvas


Elsa Altered Canvas
by Fanny Delobel

SUPPLIES
Canvas 30cm x 30 cm
Papers: Basic Grey Porcelain collection: - Chantilly
- Villeroy
- Chatsworth
- Silver Birch
Embellishments: - Basic grey Porcelain Element Stickers
- Buttons
-Strass
- ribbons (and lace)
- thin cord (" cordeline")
Miscellaneous: - Border punch : Fiskars
- 3D foam
- brown ink ( distress)
- Stickles (gold)
- Basic Grey porcelain alpha stickers


HOW TO
The idea is to use a canvas on the back... Use the "hole" to create à frame...Adhere papers inside it and on the edges (on the wood). Cut border with a punch ( the scalloped border is so nice!)
Mat your photo with patterned paper and adhere it on the background inside the frame (use 3D foam).
Add embellishments (buttons, flowers, stickers...) and glitter. Write your title with alpha stickers...At least, add a little "pet" on the edge of the canvas. Have fun!!

Thursday, August 20, 2009

Fanny- BasicGrey

Ce Bleu Azur
by Fanny Delobel

SUPPLIES
Papers: Basic Grey: Marrakech collection: - Mandarin slice
- Vanilla chai
- Calming moon
Making memories: noteworthy
Bazzill: dark brown
miscellaneous: notebook paper, cork
Embellishments:
Basic Grey Marrakech - Element stickers
Prima hydrangeas
miscellaneous: paper lace, alpha (brown and blue), gold stickles

HOW TO
Cut the edge of noteworthy paper (keep the "blue border"). Adhere it on the background.
Cut a 20cmx20cm square into "vanilla chai" paper. Cut other strips of patterned papers. Place all of them in the middle of the LO. Mat your photo with cork. Distress or ink all the edges of papers, photo and cork .
Add notebook sheet on the right side of the photo. Write your journaling.
Add embellishments: flowers, stickers, paper lace, stickles...
Add sewing on two parts of the LO. Finally write your title with alpha stickers (Place some of them on squares...and adhere them with 3D foam).

Sunday, August 16, 2009

Fanny- Quand petit plume fait son carnaval

Quand petit plume fait son carnaval
by Fanny Delobel
SUPPLIES
Papers: American crafts craft fair: "Elanore Battington" craft fair: "Pearl Bobbinhauser"
Bazzil: kraft
Making memories: Noteworthy 4x6 Spiral journaling book
embellishments:
flowers:  Heidi Swapp, Fancy pants: crocheted flowers
Tim Holtz grunge boards
miscellaneous: brown feather
Alpha: American crafts: Thickers(foam): daiquiri light green, Making memories: tiny alpha Brown,
Brads: Basic Grey
stamps: "observation" 7 gypsies stamps
Miscellaneous:  White pen, brown ink

HOW TO
Cut a strip of craft fair paper ("Pearl Bobbinhauser" 15cm x 30 cm) . Add trimmed strips of kraft bazzill to make "borders" .Adhere papers to the middle of the brown american crafts paper.

Draw white lines along the edges of background and distress it.Mat you photos with kraft cardstock and adhere them in the middle of the layout.

On the top of the background add a "journaling spiral book " sheet. Add embellishments.Ink your papers and embellishments...And finally, write your title with alpha stickers.

Saturday, July 11, 2009

Fanny- "Waaouuh!!"

Waaouuh!!
by Fanny Delobel

SUPPLIES
papers: Bazzill Apricot paper
Fancy Pants: About a Boy collection "Peace"
Buttons: My Mind's Eyes bella bella buttons
Alpha: American Crafts puffy alpha
glossy accents
3d Foam

HOW TO
Cut pattern paper ( 29cm x 29 cm) . Cut several pattern on the paper. Adhere pattern paper on the cardstock. Add "die cuts" on the LO (adhere them with 3 D foam)
Distress your papers and ink the edges.
Adhere your photo on the right of the Layout. Make frame with buttons around the photo.
Add glossy accents on cut patterns. Place your title. Have fun!!

Monday, June 01, 2009

Fanny- BasicGrey


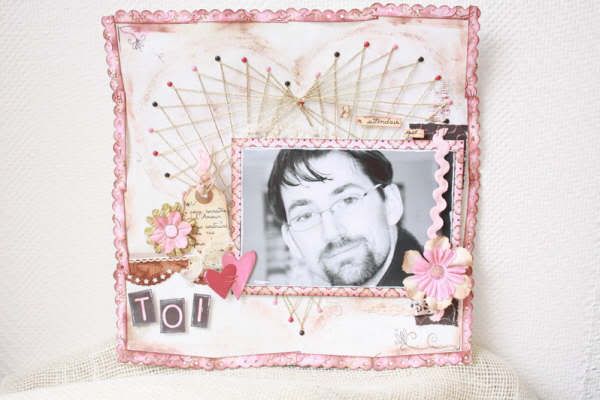
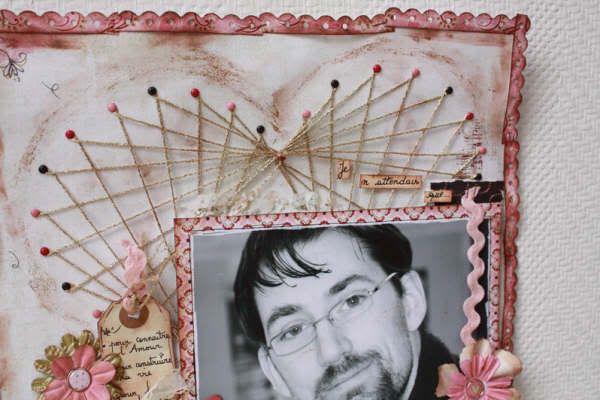
Toi
by Fanny Delobel

SUPPLIES
Papers:
* Basic Grey Bittersweet collection ( " Essence", "Mousse", " truffle", "hand dipped")
Embellishments:
* Prima flowers
* brads: Basic Grey Bittersweet collection
brads: Basic Grey glazed brads
*chipboards (hearts) Heidi Swapp
* Ribbon: chatterbox
Alpha: Basic Grey Bittersweet alpha Stickers
distress ink (brown)
miscellaneous: Cork, border punch (fiskars) , fiber, paper lace, rick rack ribbon, tag, 3D Foam


HOW TO
Distress your background paper. Draw big heart on it. Place 36 brads along the drawn line.
Take your fiber and make a knot on a brad, on the right of the LO. Count 12 brads and turn fiber around the 12th brad. Count 12 brads again...And turn the fiber around this brad...count 12 brads...Do it until you arrive at the first brad...Make a knot...
Cut a strip of "truffle" paper. Matt your photo. Adhere it on the background (place "truffle" paper under the pic)
Cut borders in the "mousse" paper and staple them along the edges of the background.Finally place your embellishments (flowers, cork border, ribbons, glazed brads...) and title...
Ink and distress the edges of your papers and embellishments....Have fun!!

Friday, May 08, 2009

Fanny- My Mind's Eye

Little Queen
by Fanny Delobel

SUPPLIES
Papers: MME papers: Penny lane collection: Maggie May "Katty Lou" Adorable swirl paper
Bohemia Bella collection: "Mother" bird, "Pretty little Girl" Mini Harlequin/ brown
Bohemia blossom collection: "Mi amore" floral/ light pink
Rub-ons: Basic grey Urban Calligraphy Rub-Ons (black)
Grungeboard dots elements
alpha: basic grey chipboards
Flowers: heidi Swapp white flower
Prima hydrangeas
pigments: Blonde moments suet lilac lustre
miscellaneous: butterfly stamps, 3D adhesive foam, brown ink (distress), gold stickles, white pen and white acrylic paint

HOW TO
Take Brown paper and cut 30cm x 30cm frame...Keep the center (floral paper).
Cut swirl paper (29 cm x 29 cm) and adhere it on the "brown frame.". Distress and ink the edges of the swirl paper.
Take harlequin paper and light pink paper and cut 2 "parts of circle" (a bigger one in the pink paper). Cut scalloped edges in the pink paper. Ink the papers and adhere them on the lower part of the background (in the right corner).
Mat your photos on the brown paper and adhere them with 3D adhesive foam.
Cut flowers in the "mother bird" paper. Adhere them with 3D adhesive foam too.
Write title with chipboard (ink them). Finally add flowers, rubons, grungeboards, stickles and pigments (on the embellishments and the edges of papers and photos).

Monday, February 16, 2009

Fanny


mon parrain
by Fanny Delobel

SUPPLIES
Papers:
* Bazzil "chocolate" and "white"
* Basic Grey Urban Prairie collection " Monarch", "Petticoat"
Flowers:
* Prima essentials 4
Glitters: stickles pink
Alpha: American Craft Thickers (Foam subway)
miscellaneous: strass, ink, border punch (Fiskars), ribbons, brown ink ( Distress)
HOW TO
Take the "monarch" paper and cut some parts of the flowers and butterflies...distress the edges and the cut patterns. Reduce the paper and adhere it on the brown bazzil paper. (be careful: don't adhere the cut patterns) Cut scalloped borders (white Bazzil) and place them under the Basic Grey " Monarch" paper, along the edges.Fold cut butterflies and flowers to add 3D effect.
Mat the photo and adhere it on the background. Finally, place the embellishments and add glitters...


Tuesday, February 10, 2009

Fanny- Decouvrir

by Fanny Delobel

SUPPLIES
Papers:
* Basic Grey: Eva collection ( "Courtier", "Decadent" " Dauphin")
* Hambly Screen prints: overlay: "Mini graph" pink
Embellishments:
*Basic Grey Eva elements stickers
* Prima flowers (elements 4)
* gold Anchors (7 gypsies)
Alpha:
* Basic Grey Eva alpha stickers
Glitters: Stickles (pink and gold)
Glossy accent
Miscellaneous:
Paper lace, beads, wire, tag, 3D foam , brads, white and black pens...

HOW TO
Cut a piece of "courtier" paper, cut a circle in the overlay (adhere it on the paper lace) and adhere your photo on the "dauphin" paper. Place elements on the background paper.
Add embellishments: stickers, flowers, brads, anchors and beads (adhered with glossy accents).
Place your title. I added doodlings with white and black pens, and glitter on the corners of the layout.
And because I love this...I inked the edges of my papers!

Friday, December 26, 2008

Fanny and Rachel- **KAISERCRAFT**

We have just one more Christmas related project to share from Fanny. She altered a KaiserCraft tree to hold photos of her and her family. The project following this one comes from Rachel and it uses the trifold mini (also from Kaiser).


KaiserCraft Christmas Tree
by Fanny Delobel
SUPPLIES
Papers:Scrapworks (paper season collection)
KaiserCraft christmas tree
Glitter: stickles gold
Glimmer mist from Tattered angels: gold and red velvet
buttons: daisy D's
chipboards: Warehouse art (diamond)

HOW TO
Take Kaiser craft "christmas tree" and glimmer mist. Put two sort of glimmer mist on the "tree" (red and gold).
Take your paper and cut a lot of circles. Ink the circles and score them.
Adhere circles on left parts of the tree (there are 4 parts)
Mat your photos and adhere pics on the right parts.
Add embellishments on the top of the tree (chipboard from warehouse art), buttons and glitters and garlands (these are cut papers).
You can add glimmer mist on papers.
Add strips of paper on the edges of the tree. and then ink them.


Hope is My Middle Name
by Rachel Burgess

SUPPLIES
Kaisercraft Altered Tri fold laced album
Kaisercraft - Hideaway Collection 12x12 papers
Kaisercraft Paper Flowers - Large - Mint
Kaisercraft Paper flowers large dusty pink
Kaisercraft Paper Flowers - Small - Blue
Kaisercraft Peace Flourishes
Kaisercraft Rhinestones - mint green
Kaisercraft Wooden Curls Flourishes
Making Memories Scrapbook Colors Honeydew
Nail file/ sanding block
Doodlebug white glitter
Buttons
Ranger Glossy Accents
American crafts Thickers – Jewellery box black
Black pen
Thick elastic (anything you like the look of – this was from a local haberdashery)

HOW TO
Paint the wooden flourishes you wish to use with the green paint and set aside to dry
Cover the 2 front flaps of the book with patterned paper. Sand down the edges with a small sanding block or nail file to get a neat finish and poke the holes through from front to back.
Paint the backs (or insides) of the front flaps with the green paint and set aside to dry.
Cover the inside leaf of the album with patterned paper and poke the holes through as with the front flaps.
Attach a photograph to the inside and add glitter to the edges. Decorate with the wooden flourishes, rhinestones and flowers. Add a button the centre of the large flower and attach a rhinestone in the centre of the button. Cover the exposed part of the button with glossy accents and sprinkle with glitter.
Decorate the painted sides of the two side flaps using patterned paper, rhinestones and flowers. Add the title using the thickers and decorate the centre of the flower in the same way as the large flower on the previous piece. Add journaling using a black pen.
Decorate the fronts of the side flaps with the rhinestones and wooded word. Cover the word carefully with glossy accents and sprinkle with glitter.
Once all pieces have dried and glossy accents has set, lace the sections of the album together using the elastic.

Friday, December 12, 2008

Apologies

Before catching up on our posts, I'd like to apologize to our readers for the long delay. To make up for it, this post is going to be nice and long, and filled with lots of Christmas inspiration!

Christiane Muller:


Carole Maurin:


Fanny Delobel


Moniek Jannink:


Kirs de Ven-Smit


Friday, September 19, 2008

Fanny- **MY MIND'S EYE**


Totally Cute
by Fanny Delobel

SUPPLIES
Papers: My Mind's Eye- 29th Street Market Carefree "Adorable" Polka Spots/Bewitching Blue, Adoring Print/Loving Lavender
Die Cut: My Mind's Eye- Adorable card die cut, flower die cut, "Totally Cute"
Flowers: Prima marketing: flowers of the month, Heidi Swapp
Glitter: Stickles gold
ink: walnut stain distress
miscellaneous: buttons and 'cordeline' (this is cord made with paper and thtere is a wire in the middle), lace

HOW TO
Take "adorable" adore print paper and ink the edges of it. Apply glitters along the edge of this background. Cut 1 rectangle in the polka spots paper (10 cm x 30.5 cm) and ink the edges. Adhere this rectangle on the background paper. Cut scalloped borders in bewitching blue paper. Apply ink on the edges and adhere them along the polka spots paper. Mat your photo and adhere it on the background paper. Take die cuts, distress and ink the edges of them. Adhere now die cuts, lace, "cordeline" buttons and flowers. Apply glitters on different parts of the layout.

Friday, August 29, 2008

Fanny- Promotion 2006/2007

We have another teacher on our team of designers. Today, Fanny made a piano hinge mini book out of cardstock and color pencils. She used photos of her pupils for this gorgeous themed mini.


Promotion 2006/2007
by Fanny Delobel

SUPPLIES
Papers: Bazzill (black, yellow, red, pink, green), Scenic Route- Appleton "Scrap Strip, Fifth Street, Third Street, Second Street"
Glitter: Stickles Gold
Glossy Accents
Miscellaneous: cork, stamp (handwriting text), dymo ribbon, alpha chipboards, brown ink, 6 color pencils, cord, black pen (posca)

HOW TO
My album is made with 24 photos, but you can use less if you want. Cut 12 strips of Bazzill papers 21 cm x 11 cm. Fold them in half to made 24 folded sheets (10,5 cm x 11cm).
Put two folded sheets together and mark on the fold every 1 cm. Cut out notches on the folded edges.
You now have 11 tabs down the 'spine' of the page. Starting with the top tab, fold every other tab forward. Repeat for all sheets.
Using one of the color pencils and 2 sheets, weave through tab 1 on the first sheet, then through tab 2 on the second sheet, then through tab 3 on the first sheet, then through tab 4 on the second sheet, and so on.
Continue in this manner until you have all pages connected.
Wrap fiber or little cord through top set of color pencils and add dabs of glossy accents occasionally.
Adhere papers on the cover. Ink all papers. Add glitter and Dymo tape.
Add cork cover and adhere photos.

Sunday, August 17, 2008

Fanny- 2x Plus de Fun **TECHNIQUE WEEK**

I saw on the web the waterfall technique used to make cards. It was so nice that I wanted to try it, but I didn’t want to do a card. So I made a layout for my daughter’s album utilizing this technique. When you pull the ribbon , you can see photos cascading down. This is a great way to use several pictures on a layout!


2 x Plus de Fun
by Fanny Delobel

SUPPLIES
Paper: Fancy Pants- Kewl Collection “Sublime,” Bazzill (purple and peach), Making Memories Noteworthy Spiral Journaling Book
Flowers: Heidi Swapp, Bazzil Wings
BasicGrey Chipboard (Two Scoops)
Grungeboard (Ranger)
Ribbons: Chatterbox
Heidi Swapp chipboard (pink and green)
Glitter: Ranger Stickles (silver)
white acrylic paint
silver pen
fancy pants clear stamps

HOW TO
Begin by making the waterfall element.
1. Cut a 30.5cm x 9.5cm strip from a sheet of Bazzill cardstock. Place the strip horizontally and create 8 score lines: the first at 15 cm from the right side and the next score lines at 1.5cm, 3 cm, 4.5 cm, 6 cm, 7.5cm, 9 cm and 10.5 cm.


2. Fold on each scored lines. Turn over the strip and fold again. You can adhere a piece of grungeboard at the end of this strip (in the 15 cm part) and staple a ribbon: it will be easier to pull off the waterfall strip. Ink all the elements.

3. Place the folded strip on a page.
Cut a 30.5cm x 2 cm strip from Bazzill cardstock.This is the anchor strip.Place it horizontally on a 30.5cm x 30.5 cm page. Do not adhere yet!
Slide the pull tab end of the waterfall underneath the anchor strip and fold the waterfall over the top of the anchor strip.
Position the waterfall element where you want on the 30.5cm x30.5 cm page. Apply adhesive to the back of the bottom edge of the first flap of the waterfall element and adhere it to the anchor strip.
Apply adhesive tape to the anchor strip on either side of the waterfall strip.Do not apply adhesive on the waterfall piece.


4. Matte all photos on 8 cm x 6.5 cm papers and ink edges ( 7 photos) . Adhere them between each score line (do not apply adhesive on the lines themselves).Start from the bottom of the waterfall to the top...
5. The waterfall is now complete.


Let’s adhere bigger photos on the left of the page. Add grungeboards, and flowers. You can add stickles. Place title and journaling.

Wednesday, August 13, 2008

Fanny- My Sweet Little Dreamer **MONOCHROMATIC**


My Sweet Little Dreamer
by Fanny Delobel

SUPPLIES
A big photo ( 30,5 cm x 17,5 cm)
Papers: KI memories- Color Theory (black) (BLACK HEREDITY , BLACK SLICE )
Clear stamps: Fancy Pants (From the Garden 12x12 Stamps)
Glitter: Ranger Stickles- black and platinum
Chipboard Alphabet: Heidi Swapp
miscellaneous: black pen,white pen, black ink

HOW TO
Cut black heredity paper ( 22 cm x 30,5 cm) and ink the edges of it.
Distress the edge of your photo with scissors. Adhere it on the center of your paper.
Adhere this on the center of the black slice paper.
Stamp flourishes in 2 opposite corners (with black ink). Stamp butterflies. I use 3D adhesive foam under butterflies.
The flowers are hand-drawn, in various sizes. Adhere them near flourish stamps.
Use stickles on the flowers (black and platinum) and along the black heredity paper (black stickles).
Write journaling on strip of paper.
Use Alpha chipboard for title, but you can hand write it too.

Wednesday, August 06, 2008

Fanny- Canvas Frame **HOME DECOR**

Last June at Scrap-A-Ganza, Fanny took a class with Jen Starr. Here she learned how to alter the back of a canvas frame so it becomes a shadow box.


Altered Canvas Frame
by Fanny Delobel

SUPPLIES
12x12 canvas
Papers: Bazzil light denim blue, BasicGrey "Petit," BasicGrey "Vineyard"
Paint: Making memories white paint, Distress Crackle paint "Faded Jeans" and " Shabby Shutters"
Inks: Tim Holtz Distress Inks "Walnut Stain," Ranger adirondack pigment Ink "Denim"
Stamps: Fancy Pants clear stamps "Fresh Mod 12x12 Stamps" , "From the Garden 12x12 Stamps"
Tim Holtz Grungeboard
Making Memories clear embellishments
Heidi Swapp Mask (bird)
Cut and dry foam
white pen (ranger inkessentials white gel pen)
Miscellaneous: Strip of denim, buttons, alpha chipboards, 3D foam adhesive, sand paper


HOW TO
We will be using the back of the canvas to create a shadow box effect.

First, paint the chipboard flowers with distress crackle paint.
Mesure the distance between the wooden structure in the back of the canvas and cut the blue cardstock 1/2 '' wider than your measurement ( approximately 9''x9"")
Using clear acrylic stamps and denim ink and stamp flourish and floral images all over the cardstock (not in the center because there will be a photo). Outline the images and doodle around stamped images with white pen.
Cut the canvas and adhere the ribbon inside it (to hang your canvas on the wall if you want) .
Adhere the blue cardstock in the canvas between the wood for the background.

Place the transparency over the opening in the back of the canvas and place the bird mask. Remove the transprency from the canvas and use the white paint to paint around the mask (with cut and dry foam ).

Cut 4 strips of the green Basic Grey paper (11 3/4"" x 1 3/4 "") Distress the edges (with sand paper and brown or blue ink).Set the transparency in place on the canvas and attach the top and bottom green paper on the transprecy (not on the canvas!).Mitter the corners of the green paper. Then attach the remaining strip of green paper to the transparency.

Matte your photo (using remaining Basic Grey green paper)Adhere your photo to the background with foam pop dots to create dimension. I did it with stamped flowers too.

Measure the edges inside of the canvas and cut 4 strips of basic Grey paper. Adhere them inside to the wood.
Measure the outside edge all around the canvas and cut 4 strips of Basic Grey paper. Adhere them to the canvas and ink the edges

Tie a knot in the strip of denim and attach to the canvas. Place flowers, buttons, painted grungeboard, pin and other embellishments to finish.

Adhere your alpha chipboards for your title.

Monday, August 04, 2008

Fanny- Altered Monograms **HOME DECOR**

The popularity of altered letters is a given in the scrapbooking world. They're easy to do, easy to display, and make wonderful gifts!


Altered Monograms
by Fanny Delobel


SUPPLIES
Patterned Paper: Basic Grey papers- Periphery collection ("Chardonnay", "Blanc" "Zinfandel")
Ink: Tim Holtz Distress Ink- "Walnut Stain."
Paint: Making memories "Hampton acorn"
Glitter: Stickles glitter glue "Golden rod"
Miscellaneous: black Pen, Buttons, sandpaper, Grosgrain ribbon, others ribbons, Die cuts (had-made sheep and stars), wool, stickers, and your printer.

HOW TO
Trace the edges of your monograms on your papers (keep the bird on the "chardonnay" paper). Paint your monograms and distress them with the walnut stain ink.
Distress papers with sand paper and ink.
Once the paint is dry, adhere your papers.
Draw (or print) and cut your embellishments. Ink them.
To print letters on your ribbon: Use your printer and print text on paper. Then, temporarily adhere grosgrain ribbon on top of the printed text and print again. Be sure to run your paper in the same way and adjust the speed to slow.
Adhere your embellishments on your monograms along the edges of the letters.
Finally adhere your lovely teddy bear (with strong glue)!

Thursday, July 31, 2008

Fanny- Birthday Mini Album **KI MEMORIES**


"Birthday Mini Album"
by Fanny Delobel

MATERIALS
Album: Plexiglass for pages, used CD, and chipboard pages
Photos
Patterned Paper: KI Memories Love, Elsie (Collections: Lola, Claire, Noel)
Lace Cardstock: KI Memories Tulips Surreal
Rub-ons: KI Memories Love, Elsie- Lola, KI Memories Glitter Rub-ons- Bloom Icons, Fancy Pants- Celebrate
Alpha: KI Memories Love, Elsie rub-ons (DAISY SPEAK)
Paint: Ranger Paint Dabbers- Pool
black and white gel pens.
Posca White Pen
Glitter: Stickles- gold, lime green and waterfall
Bind-it-all and pink wire


HOW TO
Pick photos from an event, like a birthday for example.
Choose your papers and embellissments.
For the cover, I used a cardboard plate we use for the cake base. It is decorated with Love, Elsie papers and rub-ons. Add some glitter (little dots along pink paper and a line along scalloped edge).
For the title I used Alpha rub-ons and letters cut from Love, Elsie Paper.
For each page of this mini album, you will use a standard size photo, Love,Elsie papers and rub-ons.
The most difficult thing is to be cautionary as to where you place papers and embellishments on each side of your page. Don't forget that we can see everything you add on the other side since it is a clear album. You can use paint (like me) to hide some parts of your pages .
Distress papers and embellishments and add some glossy accents on details (flowers, hearts, birds, etc). Add glitter for added dimension.
You can add other sized pages or use CD!
Use 3D foam to adhere your journaling (written on strips of paper).
And finally take your 'bind-it-all machine' and bind your mini album.
Add ribbons on the wire. I also added a little toy, a beautiful little rabbit because my daughter love rabbits!